Operations Guide
From ReliSourceWiki
(Difference between revisions)
(→How to use the application) |
(→Installation) |
||
| (5 intermediate revisions not shown) | |||
| Line 30: | Line 30: | ||
== How to use the application == | == How to use the application == | ||
| + | == Online Mode == | ||
| + | === Installing perforce SCM === | ||
| + | * Install Perforce server on a host machine from [http://perforce.com/downloads/complete_list Perforce site] | ||
| + | * Setup a Port for the perforce server. i.e.: 203.106.70.31:1666 | ||
| + | * Ensure that perforce server connection is okay | ||
| + | * Install any perforce client (P4V or perforce web client) | ||
| + | * Create some user with password and access permission using either of the perforce client | ||
| + | |||
| + | === Running the program === | ||
| + | * '''Online Mode''' | ||
* Form '''Start > All Programs''' look for the application "MEI Automated Test Tool" | * Form '''Start > All Programs''' look for the application "MEI Automated Test Tool" | ||
* Click on the icon to start the application. | * Click on the icon to start the application. | ||
| - | * | + | * For Online mode: Click on Generator or Executor icon in Welcome scree. |
| - | * | + | * Create a perforce workspace using any credential that was already stored in perforce server. You need to provide an existing perforce user id and password. Then provide a new name for workspace and a new local path location. |
| - | * | + | * After workspace creation all the latest files will be automatically cheked in at selected workspace. |
| - | * | + | * Then user will be able to create and execute test case from there and also do version control operation from test library section. |
| - | * Try to Generate some test suites and test cases using the video | + | |
| + | * '''Offline Mode''' | ||
| + | * Form '''Start > All Programs''' look for the application "MEI Automated Test Tool" | ||
| + | * Click on the offline button from welcome screen | ||
| + | * Select a local workspace path. | ||
| + | * Populate Suite and Case directory with some delivered Cases and Suites file. | ||
| + | * Try to Generate some test suites and test cases using the video demos as reference. | ||
* Save the suites and cases. | * Save the suites and cases. | ||
* Connect SC83 device at your workstation. | * Connect SC83 device at your workstation. | ||
* From Settings>Configuration make sure that Com Port is set at proper value (i.e. COM1) | * From Settings>Configuration make sure that Com Port is set at proper value (i.e. COM1) | ||
* Now switch at executor section | * Now switch at executor section | ||
| - | * Open a Suite | + | * Open a Suite. |
| - | * Try to run the test cases of the suite according to the instruction in video | + | * Try to run the test cases of the suite according to the instruction in video demo. |
| - | + | ||
| - | + | ||
| - | + | ||
| - | + | = Uninstall = | |
| - | + | ||
Latest revision as of 11:52, 12 August 2011
Contents |
Introduction
Overview
This test tool should provide the ability to define and execute formal suites of manual and automated test scripts for the MEI Cashflow SC Bill Acceptor. The application should provide an efficient and user friendly environment to allow test suites to be executed by non-technical personnel. The application should allow for future expansion to test other protocols.
Installation
Prerequisites
- Windows Installer 3.1
- .Net version Microsoft .Net Framework 4 Client Profile
Install
- To install the tool run MEI Automated Test Tool/setup.exe file. At the following screen click "Next"
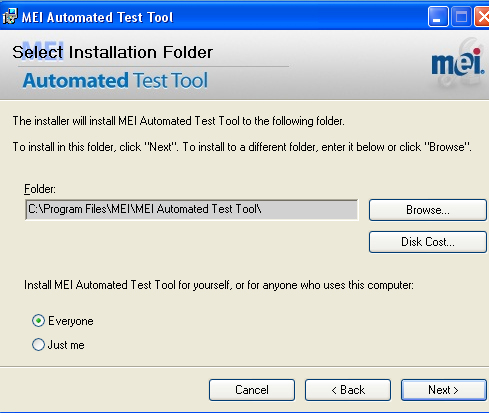
- Then select your installation location according to following screen and click "Next"
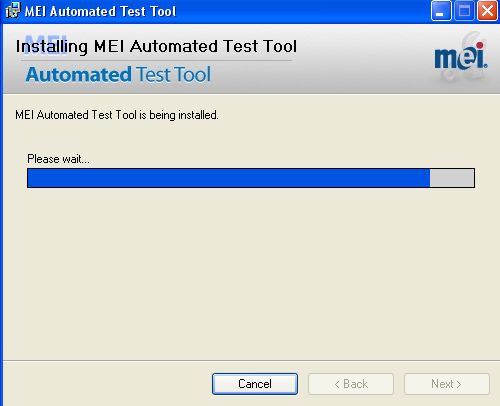
- Installation will begin and you will see the installation progress.
- At end Click "Close" to finish Installation.
How to use the application
Online Mode
Installing perforce SCM
- Install Perforce server on a host machine from Perforce site
- Setup a Port for the perforce server. i.e.: 203.106.70.31:1666
- Ensure that perforce server connection is okay
- Install any perforce client (P4V or perforce web client)
- Create some user with password and access permission using either of the perforce client
Running the program
- Online Mode
- Form Start > All Programs look for the application "MEI Automated Test Tool"
- Click on the icon to start the application.
- For Online mode: Click on Generator or Executor icon in Welcome scree.
- Create a perforce workspace using any credential that was already stored in perforce server. You need to provide an existing perforce user id and password. Then provide a new name for workspace and a new local path location.
- After workspace creation all the latest files will be automatically cheked in at selected workspace.
- Then user will be able to create and execute test case from there and also do version control operation from test library section.
- Offline Mode
- Form Start > All Programs look for the application "MEI Automated Test Tool"
- Click on the offline button from welcome screen
- Select a local workspace path.
- Populate Suite and Case directory with some delivered Cases and Suites file.
- Try to Generate some test suites and test cases using the video demos as reference.
- Save the suites and cases.
- Connect SC83 device at your workstation.
- From Settings>Configuration make sure that Com Port is set at proper value (i.e. COM1)
- Now switch at executor section
- Open a Suite.
- Try to run the test cases of the suite according to the instruction in video demo.


